How to Build a Restoration Report for an Insurance Carrier
Brighthammer TeamReporting
Key Takeaways
- Confirm the report type, submission channel, and required forms before anyone starts assembling photos or records.
- Structure the report so a carrier can answer what happened, what your crew observed, what work was done, and where the evidence lives.
- Lead with what the reviewer needs first: initial, progress, final, and supplemental reports each emphasize different details.
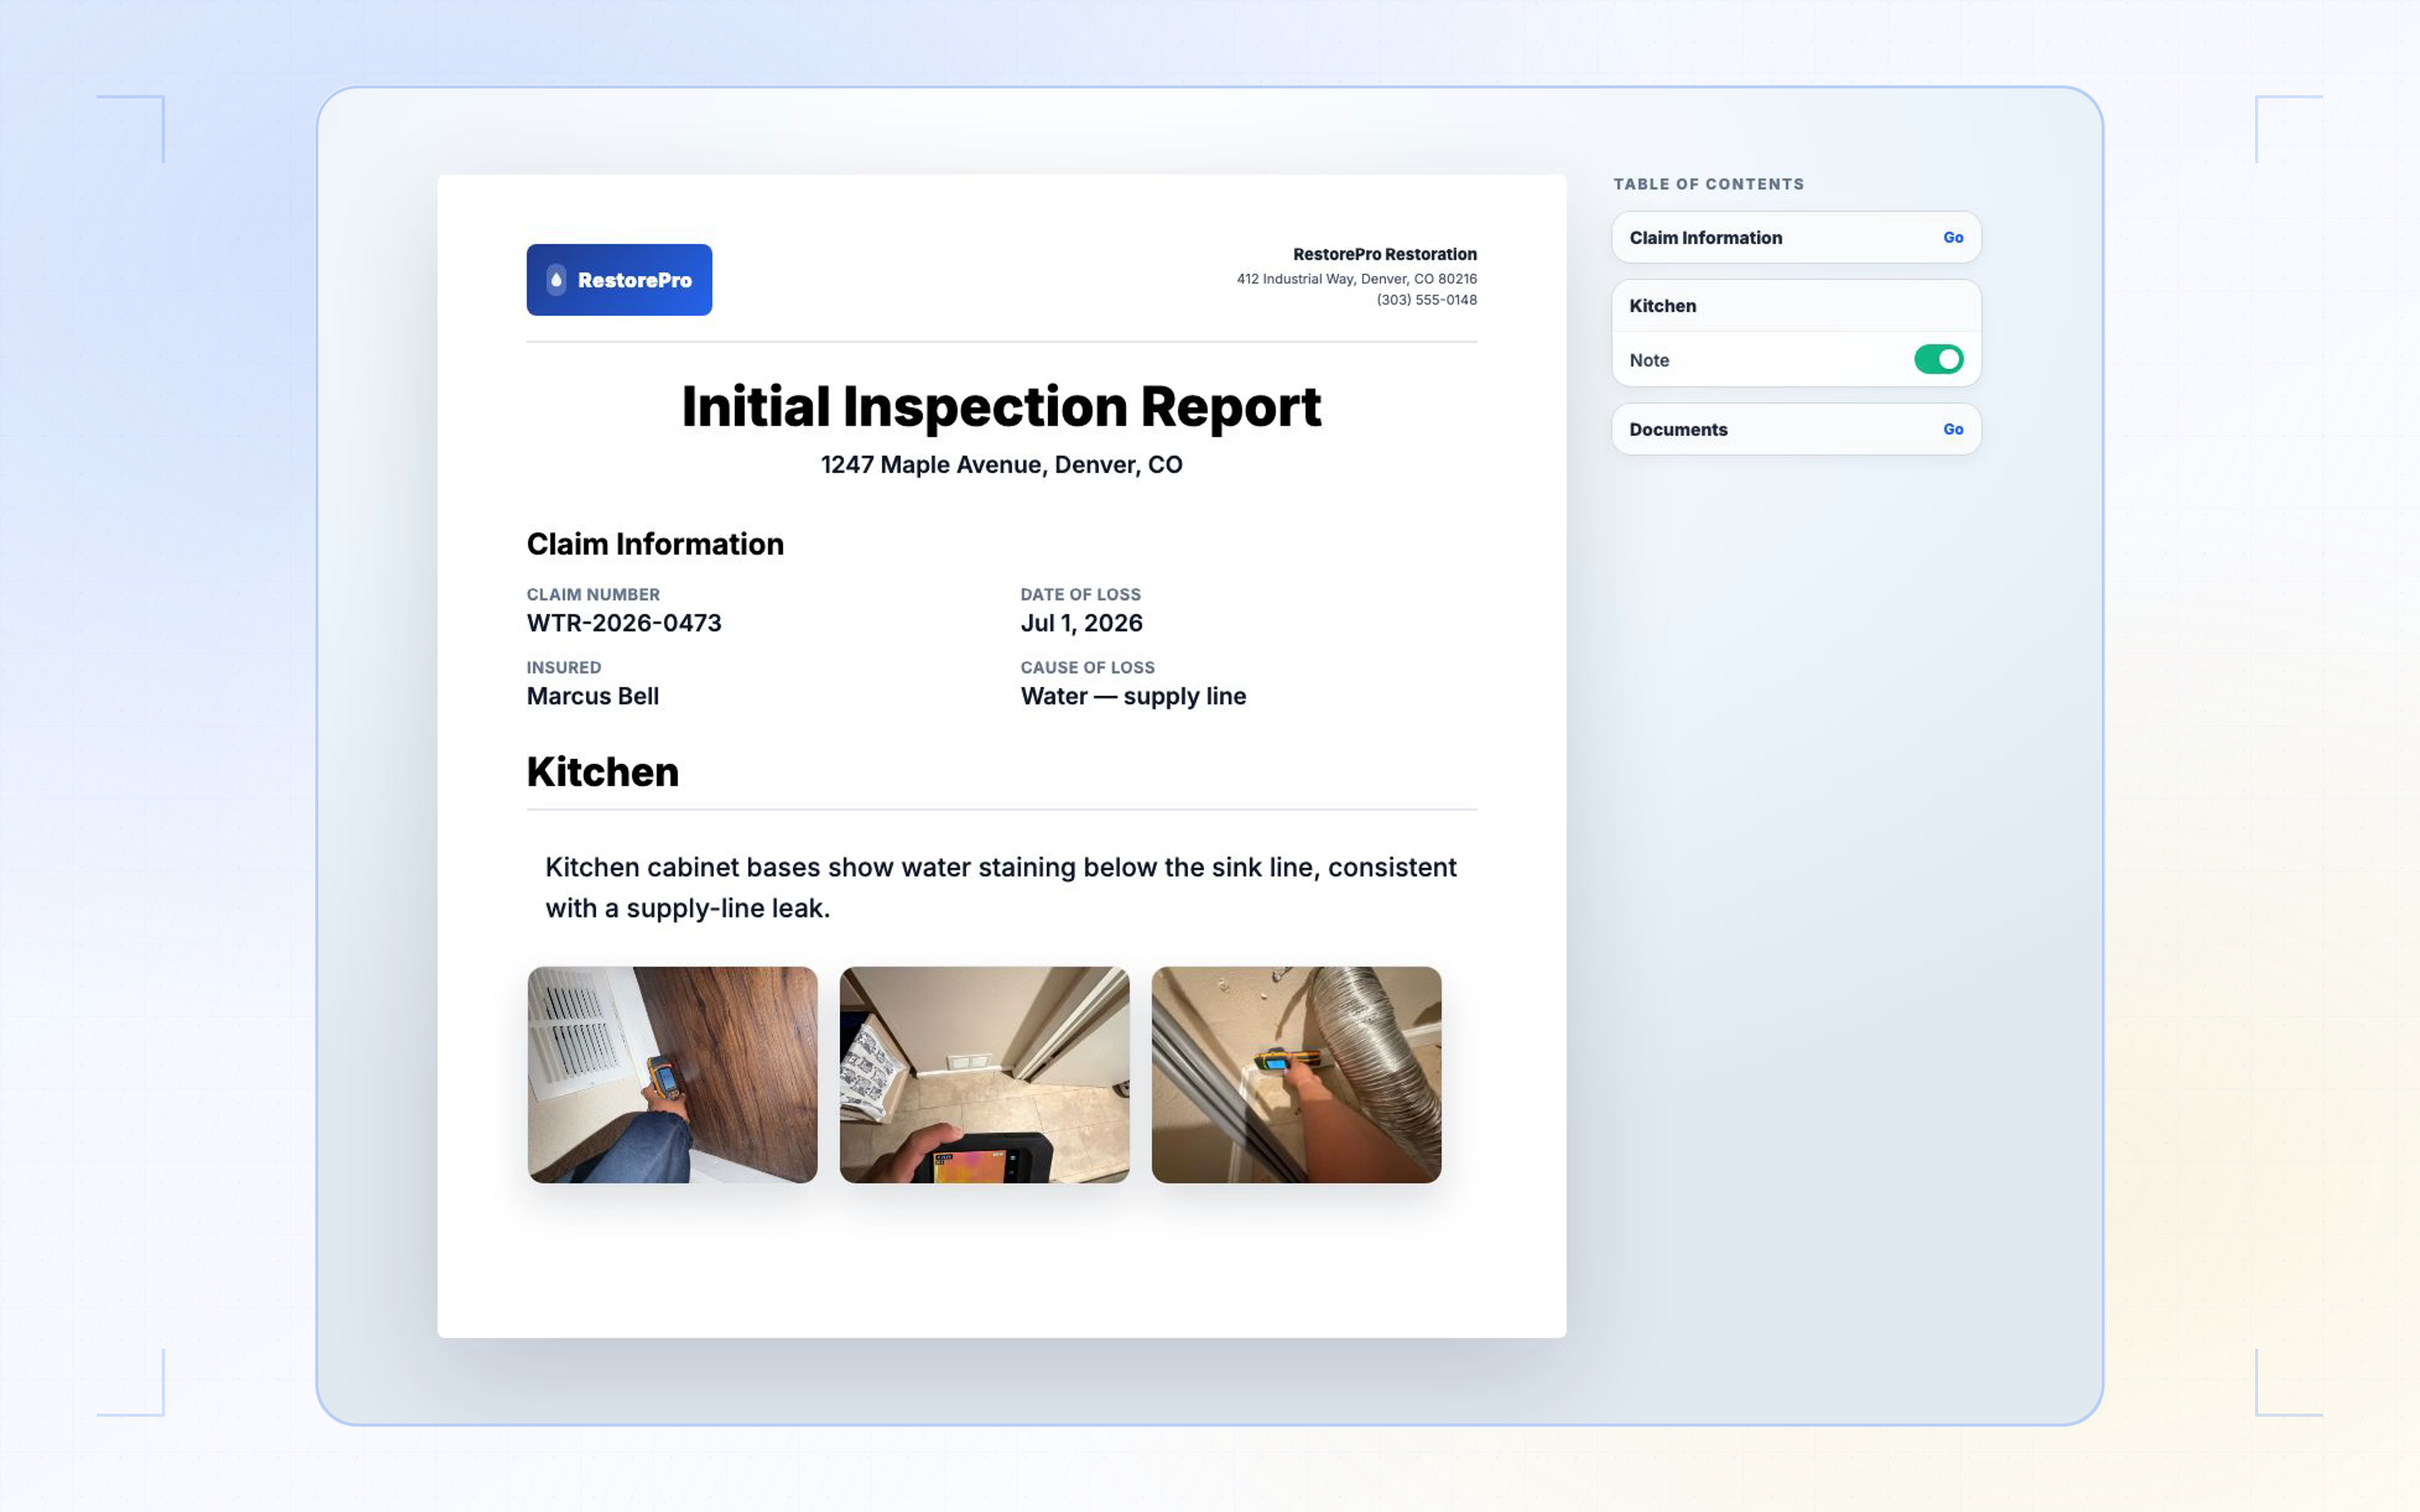
A restoration report should let a carrier or adjuster answer four questions: what happened, what your crew observed, what work was completed, and where the supporting record is.
If the reviewer has to call to ask which room a photo came from, when a reading was taken, or why an item appears in the estimate, the report is missing context. Make each statement easy to trace back to the relevant photo, note, reading, measurement, form, or work record.
Submission requirements vary by claim and program. Follow the recipient’s instructions and the standards, contracts, and company procedures that control the job. The structure below is a practical starting point, not a universal carrier template.
Confirm what the recipient wants before building the report
Check the submission instructions before anyone starts arranging photos. This keeps the team from completing the wrong report type, combining documents that should be separate, or sending the package through the wrong channel.
Confirm:
- Claim or assignment number
- Insured name and loss address
- Assigned adjuster or program contact
- Required portal, email address, or file format
- File-naming, file-size, and document-separation rules
- Forms or supporting documents requested for the claim
- Whether the recipient wants an initial, progress, final, or supplemental report
The report type changes what the reviewer needs to see first:
If the recipient requests another claim form or document, flag it and follow the instructions for that item. Do not assume the contractor’s report replaces it.
| Report type | Lead with |
|---|---|
| Initial | Arrival condition, affected areas, initial evidence, work completed, and open questions |
| Progress | Changes since the prior report, new records, work or equipment changes, and current status |
| Final | Completed visit timeline, final recorded condition, closeout actions, outstanding items, and completion documents |
| Supplement | The new fact, scope change, or requested item; the earlier submission it affects; and the record supporting the update |
Put the job identity and current status on the first page
Use the first page to identify the file, define the period the report covers, and show what remains open. This gives the reviewer a map before the supporting detail begins.
Include:
- Restoration company and report author
- Insured name, loss address, claim number, and adjuster
- Date of loss, inspection dates, and report date
- Report type, status, and version
- Short loss description
- Affected areas
- Work period covered by the report
- Current job status and open items
- The review, decision, or next action requested from the recipient
Separate reported information from direct observations. Write “the occupant reported” when the statement came from the customer. Write “the technician observed” when the crew saw or measured it. If the cause has not been established, do not turn an assumption into a finding.
A compact opening summary could read:
The summary gives the reviewer a map of the file. The sections that follow provide the evidence.
Hypothetical example: The occupant reported a supply-line release in the kitchen on July 18. During the initial visit, the technician documented visible water impact at the kitchen base cabinets and the adjacent hallway. This report covers the initial work and the monitoring visits listed in the timeline. The file remains open pending the final visit and completion documents.
Build one evidence block for each affected area
Organize the report body by room or clearly named area. Use the same area name in the floor plan, photo captions, readings, work notes, estimate, and attachments.
Each area block should answer:
- What condition did the crew observe?
- Where exactly was it located?
- Which records support the entry?
- What work did the crew complete?
- What changed or remains open?
Here is one hypothetical area block:
This format keeps the condition, evidence, work, and follow-up tied to one place. It also exposes gaps before submission. If the estimate includes an affected hallway but the report has no hallway block, the mismatch is easy to see.
| Field | Kitchen entry |
|---|---|
| Area | Kitchen, sink wall |
| Observed condition | Visible water impact at the cabinet toe-kick and adjacent lower wall area |
| Supporting record | Photos K-01 through K-06, kitchen sketch, and initial-visit readings |
| Work recorded | Initial work log records extraction in the kitchen at 10:40 a.m. by Technician A; photos K-07 through K-09 show the area after the visit |
| Follow-up | July 19 entry records the next observations at the same locations, current status, and planned next check |
Connect every statement to a specific record
Link each statement in the report to the record that supports it. A large photo appendix or an unlabeled table of readings makes that harder than it needs to be.
Give each selected photo:
- A stable photo ID
- Room or area name
- Capture date or visit
- A caption stating what the image shows
- A reference from the relevant area block or work entry
Label readings and measurements with the same care. Include the location, material or surface when relevant, visit date, and the instrument or record associated with the entry. Keep the label consistent anywhere that reading appears.
Use captions to explain the purpose of the record, not to claim more than it shows. “K-04: visible staining at the cabinet toe-kick before extraction” is specific. “K-04: proof of covered water damage” makes a coverage conclusion the photo cannot establish.
Show the job in visit order
Use a timeline when the report covers more than one visit. Each entry should show what the crew found, what they did, which record supports the entry, and what changed next.
For each visit, record:
- Actual date and time
- Areas checked
- Condition found
- Work or equipment change
- Supporting photo, reading, note, or form
- Reason for the change, when it was documented
- Current status and next action
Do not add a reason from memory during report assembly. If the record shows that equipment moved but does not explain why, state what is known and flag the missing explanation.
The timeline matters most when the estimate or invoice depends on duration, repeat visits, equipment records, or a change in scope. Consistent visit entries let the reviewer follow the sequence without rebuilding it from photo timestamps.
Keep the report, estimate, and attachments synchronized
Use the same room names, dates, measurements, work descriptions, and version numbers across the entire package. The report explains the field record; the estimate or invoice prices the scope. Consistent labels let the reader move between them without translating one document into another.
For an estimate item that may prompt a question, point directly to the relevant report section and record IDs. Attach the applicable floor plan, measurement, log, signed authorization, change order, invoice, or other supporting document.
Keep the report body focused on the loss, affected areas, evidence, work, and current status. Put supporting records behind it in a stable order:
- Cover page and job summary
- Area index, floor plan, or sketch
- Room-by-room evidence blocks
- Visit and work timeline
- Current status or closeout section
- Photo appendix
- Readings, drying, or equipment logs
- Authorizations, forms, and change records
- Estimate, invoice, or supplement
- Requested third-party reports
If a portal requires separate uploads, preserve the same job number, area names, document names, and version labels across the files. The parts should still read as one record after they are separated.
Run the reviewer reconstruction test before sending
Give the completed report to someone who was not on the job. Ask them to reconstruct the file using only what you plan to submit.
Every guess points to a missing label, reference, or explanation. Fix those gaps before export. Page count and visual polish cannot make up for a report the reviewer has to decode.
- Can they identify the property, claim, report type, work period, and version?
- Can they explain the recorded condition without guessing at cause or coverage?
- Can they find the supporting record for each affected area?
- Can they see what changed between visits?
- Can they trace a questioned estimate item to a photo, note, measurement, log, form, or authorization?
- Can they tell what is complete, what remains open, and what the recipient is being asked to review?
Build the report without rebuilding the job
If the office has to pull photos, notes, readings, and signed forms from separate places, it has to reconstruct the job before it can finish the report. Brighthammer Reports builds the PDF from the same job file as those field records.
Sources
- National Association of Insurance Commissioners: Post-Disaster Claims Guide
- National Association of Insurance Commissioners: What You Need to Know When Filing a Homeowners Claim
- Insurance Bureau of Canada: How to File a Business Insurance Claim
- ANSI/IICRC S500: Standard for Professional Water Damage Restoration
- Brighthammer: Reports
Restoration Report FAQs
A restoration report should be only as long as needed to explain the affected areas, work completed, changes between visits, current status, and supporting records. Follow any file or page rules from the recipient. If none are provided, keep the main report easy to scan and place detailed logs, forms, and other supporting records in the attachments.
Use the number of photos required by the recipient. If no number is specified, include enough selected images to orient the reviewer in each affected area and support the conditions, work, and changes described in the report. Remove near-duplicates unless they show a meaningful difference.
If a photo, reading, or explanation is missing, identify the gap and check the original job records before finalizing the report. If the information cannot be verified, mark it unresolved and follow the recipient’s and your company’s procedure for correcting or supplementing the file. Never invent a value or reason from memory.
An AI-generated restoration report or claim summary should be reviewed by a person before it is sent. Verify the job identity, dates, affected areas, work descriptions, and record references, then remove anything irrelevant or unsupported and follow the recipient’s instructions.
Do not assume that a contractor’s restoration report replaces a proof-of-loss form. For Canadian claims, the Insurance Bureau of Canada says an insurer may ask the insured to complete a proof-of-loss form containing signed and sworn statements. Treat that form, or any other requested claim document, as a separate item unless the recipient tells you otherwise.
Create a supplement or revised version according to the recipient’s instructions. Give it a new version number and date, identify the information that changed, reference the earlier submission, and attach the supporting record. Do not silently replace the earlier report.